|
Main menu - File - Other operations... - Batch image transformation |
|

After activating the menu item "File → Other Operations → Batch Image Transformation" or using the keyboard shortcut Ctrl+P, the "Batch Image Transformation" dialog box opens.
The "Batch Image Transformation" window contains the following tabs:
and the buttons:
TAB Operation
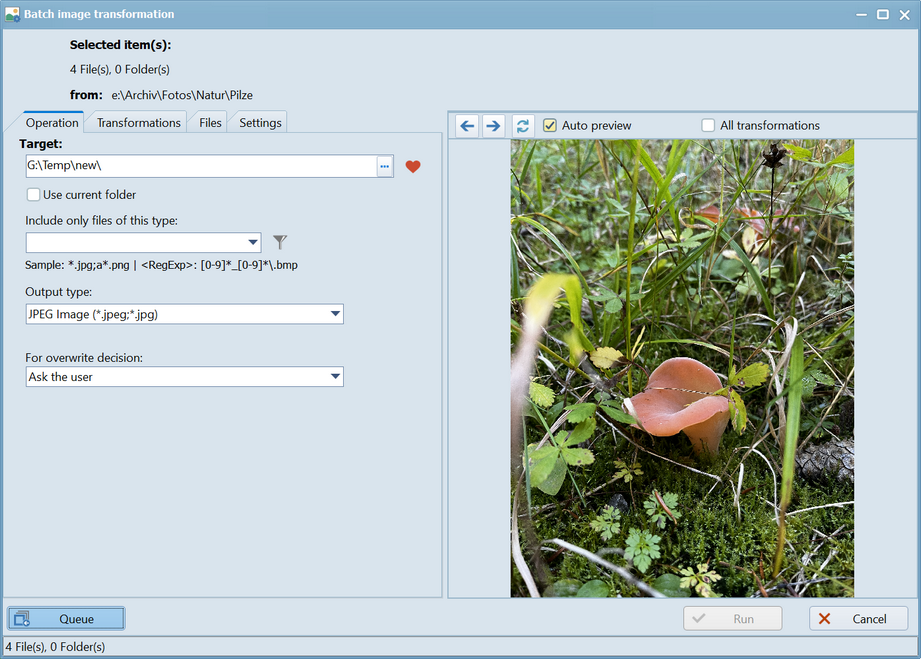
The "Selected items" information differs depending on how many images are to be transformed:
- One image to be transformed
If only one image is selected, the name of the image to be transformed is displayed under "Selected items". - Multiple images to be transformed
If multiple images are selected, the number of images to be transformed is displayed under "Selected items".
from
Shows the folder from which the selected images are to be transformed.
Target
- Input field target
The "Target" input field initially displays the inactive folder and, if only one image is selected, the image name. If multiple images are selected, only the target folder is displayed. - Option Use Current Folder
If this option is checked, the folder in the input field is overwritten with the active folder. This makes the source and destination folders identical.
Clicking the option again uncheck the option and restores the initial field content. - Button

Activating the button displays a selection list of favorite folders. Clicking a folder in the selection list overwrites the folder in the input field with the selected favorite folder. - Button

Activating the button or pressing the keyboard shortcut "F4" opens the standard "Browse Folder" dialog. After selecting a folder and confirming with "OK," the folder in the input field is overwritten with the selected folder
Include only files of this type
- Input field "Include only files of this type"
The "Include only files of this type" input field allows to restrict (filter) the number of items selected in FreeCommander. This reduces the number of images to be transformed. Wildcards and regular expressions can be used in this input field.
Once a filter is applied and the "Files" tab (or the "Run" button) is activated, the list of files is reduced and the information bar is updated. - Button

After activating this button, a selection list appears with the most recently entered values in the field and (for entering regular expressions) the text "<RegExp>:". Clicking on a line in the selection list overwrites the current value of the input field with the value of that line. - Button

Activating this button displays a selection list with the filters created under ("Folder → Filter → Set Filter" (Alt+Y), in the "Define" section). After selecting a filter, the current content of the input field is overwritten with "<Filter>:" + "Contents of the filter".
Output type
Under Output type, the image type can be selected, with which the transformed files should be saved in the target folder.
For overwrite decisions
Under this option can specified what should happen to files in the target folder that have the same name as the files being transformed. The following overwrite options are available:
- Ask the user
If this option is selected and a file with the same name (as the transformed image) already exists in the target folder, the user dialog "Confirm Overwrite" appears, allowing the user to define how the conflict should be handled. - Overwrite all
If this option is selected, any file with the same name (as the transformed image) that already exists in the destination folder will be overwritten without asking. - Skip all
If this option is selected, no file will be transformed if a file with the same name already exists in the target folder. - Auto rename target item
If this option is selected, if a file with the same name (as the transformed image) already exists in the target folder, this existing file will be renamed without asking.
Example: The file "FreeCommander.exe" becomes the file "FreeCommander(2).exe". If the file "FreeCommander(2).exe" already exists, the copy is named "FreeCommander(3).exe", and so on.
Tab Transformations
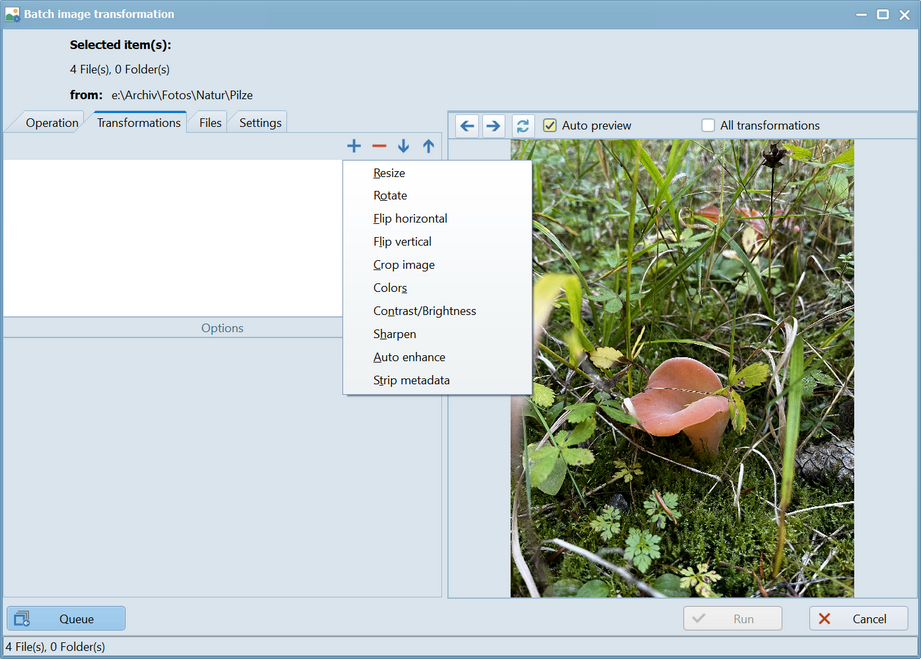
With  an additional transformation can be added to the list of transformations to be performed. The selected transformation can be deleted using
  .
.
Offered transformations:
Resize
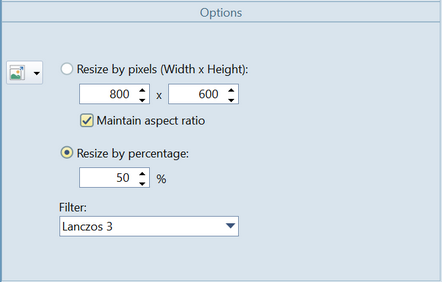
Three methods are offered for resizing an image:
- Width and height in pixels
In the input fields, the height and width of the transformed image can be freely defined in pixels.
If "Maintain aspect ratio" is checked, these values are automatically adjusted to preserve the height-to-width ratio of the original image. - Resize per percentage
In the input field, you can define what percentage of the original image the transformed image should be. - Resizing via standard sizes
After activation of , standard sizes are available for selection.
Filters
The selection field offers various filters that can be used to perform the resizing.
Rotate
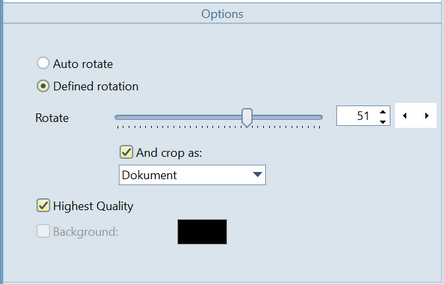
- Auto rotate
Cancels the defined rotation. - Defined rotation
Values between -180° and +180° rotation can be defined. This can be done continuously using the slider or by direct input. The arrow keys can be used to define the rotation in 90° increments.
If "And Crop As" is checked, you can choose whether the image should be cropped as a photo or as a document. - Highest quality
If "Highest Quality" is checked, the rotation result will be of the highest quality. - Background
If "Background" is checked, the color can be changed by clicking on it.
Flip horizontal
Flips the image horizontally.
Flip vertical
Flips the image vertically.
Crop image
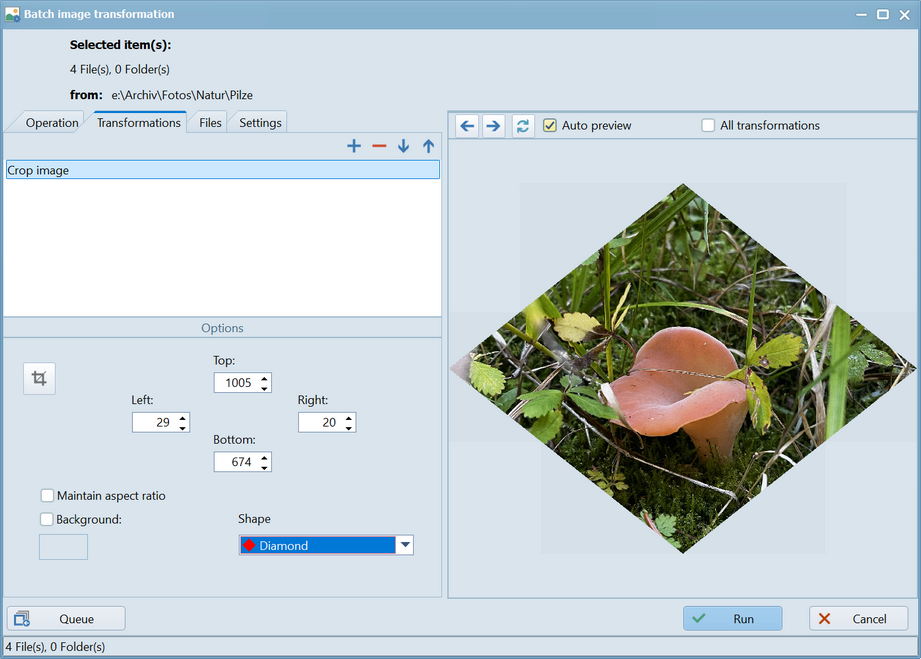
- Cropping with Crop Mode
The crop mode is activated via the button . The following appears in the image window:.
 - The heading "Select crop area".
- A rectangle with which the desired crop area can be defined by dragging the handles.
If "Maintain aspect ratio" is checked, the crop is automatically adjusted as you drag to maintain the original image's height-to-width ratio. - The button
 , which, when activated, crops the selected area, enters the crop area's borders into the input fields, and exits crop mode.
 - The button
 , which, when activated, exits crop mode without applying the crop area.
 - Cropping by editing the borders
The crop area can be defined using the "Top", "Left", "Right", and "Bottom" input fields. - Maintain aspect ratio
If "Maintain aspect ratio" is checked, the crop will automatically adjust to maintain the original image's height-to-width ratio. - Background
If "Background" is checked, you can change the color by clicking on it. - Shape
A different shape can be selected by clicking on the "Shape" selection box.
Colors
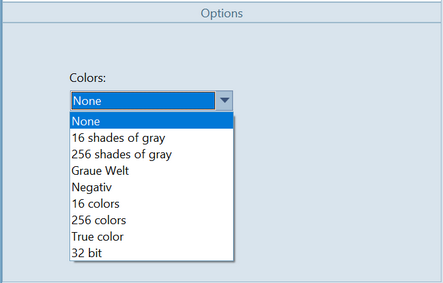
After clicking on the "Colors" selection box, a different color depth can be selected.
Contrast/Brightness
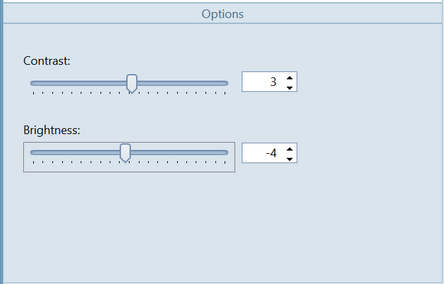
Brightness and contrast can each be defined separately as values between -100 and +100. This can be done continuously using the respective slider or by direct input. The arrow keys can be used to increase or decrease the values by 5.
Sharpen
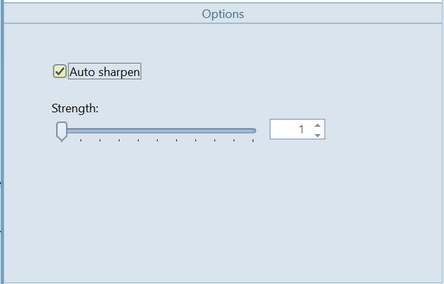
If "Auto Sharpen" is checked, the image will be sharpened automatically. If not, the sharpening level can be adjusted between 1 and 100. This can be done continuously using the slider or by direct input. The arrow keys can be used to increase or decrease the values by 1..
Auto enhance
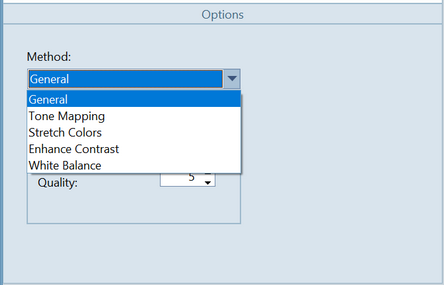
Improve the contrast and colors in the image (performs a series of complex operations to improve the contrast and colors in the image).
For each item in the transformations list, one of the following automatic enhancement methods can be selected.
(Multiple methods can be applied by inserting the "Automatic Enhancement" transformation multiple times).
- General
- Slop
The tilt can be defined between 0 and 90 degrees by direct input or using the arrow keys. - Range
The range can be defined between 0 and 100 by direct input or using the arrow keys. - Quality
The range can be defined between 0 and 100 by direct input or using the arrow keys. - Tone Mapping
Improves brightness by applying a local adaptation tone mapping algorithm. - Gamma
The resulting brightness can be adjusted between 0.01 and 1 by direct input or using the arrow keys. The default value is 0.35. - Saturation
The color saturation can be adjusted between -100 and 100 by direct input or using the arrow keys. The default value is 80. - Stretch Colors
Adjusts the image brightness by stretching the colors to the maximum permissible value. - Enhance Contrast
Applies a Wallis filter to the image. The Wallis filter is a locally adaptive image enhancement algorithm. - White Balance
Changes the image colors by adjusting the white balance.
Strip metadata

One or more options can be selected to remove specific metadata.
Tab Files

The "Files" tab displays a list of the files to be transformed.
Quick filter
The listed files can be further reduced by a quick filter.
- Input field Quick filter
The number of images to be transformed can be reduced with the content of the input field located on the left below the file list. Wildcards and regular expressions can be used in the input field. When the mouse pointer is over the input field, examples of the input are displayed. - Button

A left-click on the icon opens a pop-up menu with the following options:
- Inverse quick filter
If the input field in the quick filter bar is not empty, the filter can be inverted by selecting the "Inverted Quick Filter" menu item. - Recent filter List
One menu item per filter. Clicking these menu items activates the corresponding filter. - Clear history
Selecting this menu item clears the list of recent filters. - Clear edit field
Selecting this menu item clears the input field and deactivates the filter.
- Button
After activating the button, the quick filter is enabled and the "Disable filter" option is displayed.
 - Button
After activating the button, the quick filter is disabled and the "Enable filter" option is displayed.
Tab Settings
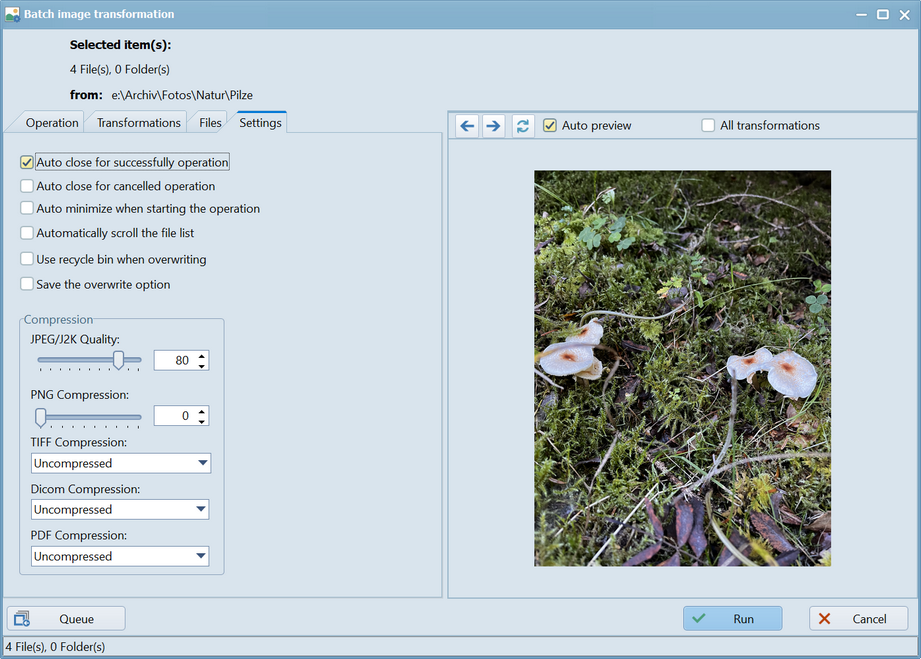
Auto close for successful operations
If this option is checked, the transformation dialog will close automatically once all transformation operations have been successfully completed.
Auto close for unsuccessful operations
If this option is checked, the transformation dialog will close automatically after a transformation operation is canceled.
Auto minimize when starting the operation
If this option is checked, the transformation dialog will minimize automatically after the button is activated.
Automatically scroll the file list (slower speed)
If this option is checked, the list of files will scroll automatically while the transformation operation is running, and each transformed file in the list will be selected.
Caution: This will slow down the transformation process if there are a very large number of files to be transformed.
Use the Recycle Bin when overwriting files
If this option is checked, each file overwritten during the transformation operation will be moved to the Recycle Bin.
Save the overwrite option
The override decision defined in the "Options" tab can be saved here for future image batch transformation calls by checking this box.
Compression
- JPEG/J2K Quality
Compression levels between 1% and 80% can be defined. This can be adjusted continuously using the slider or by direct input. - PNG-Compression
Compression levels between 0% and 80% can be defined. This can be adjusted continuously using the slider or by direct input. - Tiff-Compression
After clicking on the selection box, either "Uncompressed" (do not compress) or a compression method can be selected. - PNG-Compression
After clicking on the selection box, either "Uncompressed" (do not compress) or a compression method can be selected. - Dicom-Compression
After clicking on the selection box, either "Uncompressed" (do not compress) or a compression method can be selected. - PDF-Compression
After clicking on the selection box, either "Uncompressed" (do not compress) or a compression method can be selected.
The image window
The image window can display the contents (images) of the files in the left-hand file list.
Button 
Activating this button highlights the file immediately preceding the currently selected file. If "Automatic Preview" is checked, the image of the newly selected file is displayed.
Button 
Activating this button highlights the file immediately following the currently selected file. If "Automatic Preview" is checked, the image of the newly selected file is displayed.
Button 
Activating this button displays the image of the selected file.
Auto preview
If "Automatic Preview" is checked, the image of the selected file is always displayed after changing the selected file.
All transformations
If "All Transformations" is checked, all defined transformations are considered when displaying the image, otherwise, only the most recent transformation is shown.
Information bar
In the "Batch Image Transformation" window, the information line "... files, ... folders" at the bottom indicates how many images are to be transformed. Whenever the "Files" tab (or the "Run" button) is activated, the images to be transformed are loaded, and their number is calculated and displayed.
The number of images to be transformed (displayed in the information bar) may differ from the number of selected files and folders (displayed under "Selected Items"). This discrepancy can occur because a filter may be applied in the "Include only files of this type" field, or a quick filter may be active.
Button Queue
Activating the button  adds the transformation operation to the operations queue and starts processing the queue. File operations via the queue are described in the Operations Queue chapter.
Button Run
When the "Run" button is activated, all transformation operations for all images are performed and all transformed files are saved.
Button Cancel
If the "Cancel" button is activated, the transformation process (of this and all subsequent files) will be canceled. All previously completed transformations will be retained. The transformation dialog will close.